There are several ways to access the Email tool in D2L. This documentation will cover the two basic methods: the Minibar method and the Classlist method.
Email in D2L is outgoing only! Any replies you receive to an email you compose in D2L will be delivered to your ETSU email account.
Accessing the Email tool via the Minibar
To access the Email tool from the Minibar click on the envelope icon and select the Go to Email hyperlink.
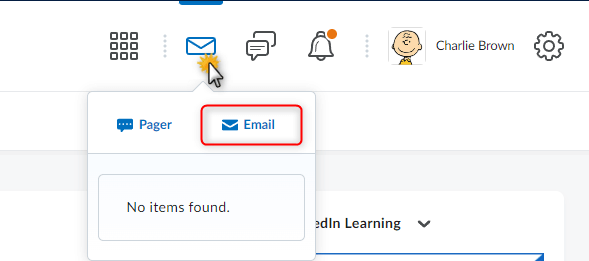
After clicking the Go to Email hyperlink you will be directed to the Compose New Message screen.
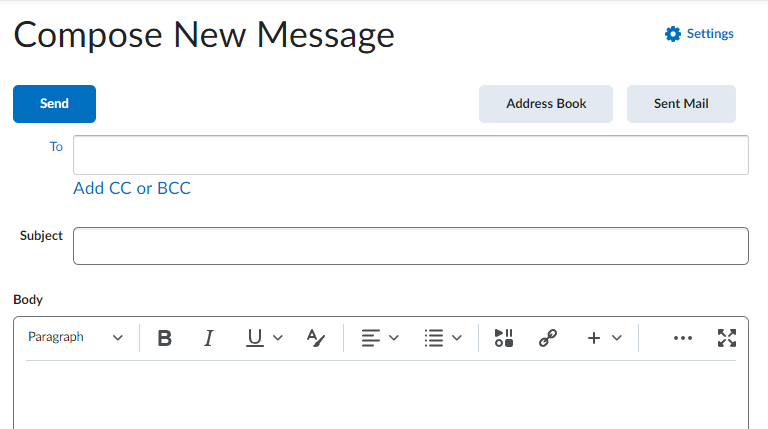
Action Buttons
-
Send - Once you have finished composing your email message, click the SEND button to send the email to your intended recipients.
-
Address Book – Retrieve a classmate or instructor email address from the Address Book. This option allows for you to view email addresses for users in each class in which you are actively enrolled. Select one or more recipients, then click on the TO, CC, or BCC links to add them to the Recipients area. Once you select all your recipients, click Add Recipients to add these recipients to your new message.
-
Sent Mail – If the setting to save a copy of each outgoing message to the Sent Mail folder is selected in the Email Options/Settings, a copy of each message you send via D2L will be stored in this folder.
-
To/CC/BCC Fields – You may type in additional email addresses in the TO and CC fields. Note that you must type out the entire email address. You can include multiple addresses by separating each address with a semicolon. Click the small X, located on the far right-hand side of each address, to remove the email address.
-
Subject Line – The system will automatically populate the course code and course name in the subject field. You may edit this field if you wish.
-
Body – Compose your email in the body textbox. You may use any of the formatting options available to you.
-
Upload Attachments – If you would like to include an attachment with your email, use the Upload button to attach a file(s) to the email.
Accessing Email via the Classlist
Sending an Email through the Classlist
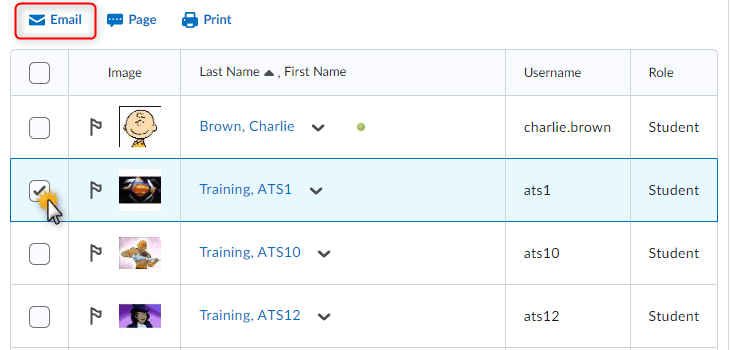
You may choose to email individual users through the classlist, all users who fall within a particular category or tab (i.e. all students), a select group of users, or you may email everyone in the classlist.
To Email One User
-
Locate the user in the classlist
-
Mark the checkbox to the left of the user’s profile picture
-
Click the Email hyperlink
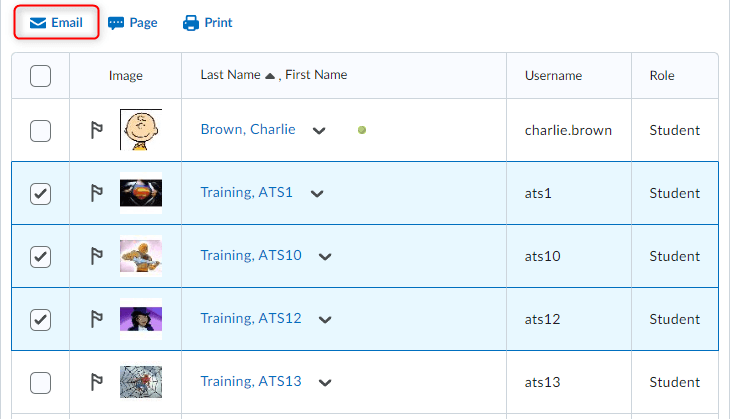
To Email Multiple Users
-
Locate the users in the classlist
-
Mark the checkbox to the left of the users’ profile pictures
-
Click the Email hyperlink
To Email the Entire Classlist
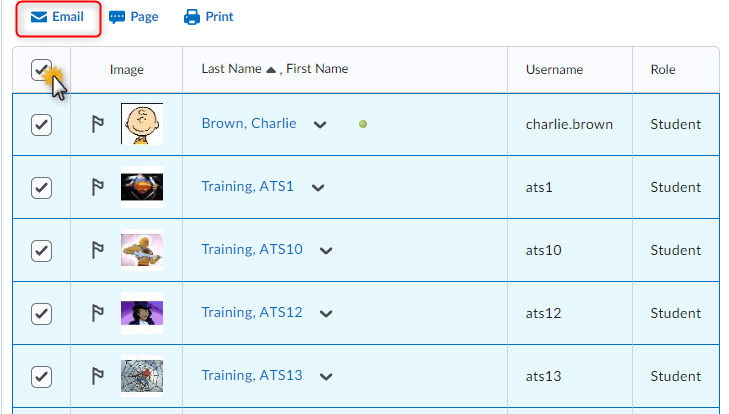
-
Click on the ALL tab to display all users in the classlist and ensure that all users are displayed. Note that sometimes D2L divides users across multiple pages. You may have to change the number of users-per-page.
-
Click the Select All checkbox
-
Click the Email hyperlink
After clicking the email hyperlink a new window will open which allows you to compose a new message.

-
Send - Once you have finished composing your email message, click the send button to send the email to your intended recipients.
-
To/CC Fields – You may type in additional email addresses in the TO and CC fields. Note that you must type out the entire email address. You can include multiple addresses by separating each address with a semicolon.
-
BCC Field – The email addresses of the users you selected from the classlist will automatically populate in this field. Click the small X, located on the far right-hand side of each address, to remove the email address.
-
Subject Line – The system will automatically populate the course code and course name in the subject field. You may edit this field if you wish.
-
Email Body – Compose your email in the body textbox. You may use any of the formatting options available to you.
-
Upload Attachments – If you would like to include an attachment with your email, use the Upload button to attach a file(s) to the email.
 South Dossett Drive - Closure...